
clasp を使用してGASをローカル環境で開発する
基本的にGASはブラウザ上のエディタで開発する必要があり、若干面倒ですね。
それにエディタが使いにくく(慣れてないだけかも)、使い慣れたエディタで開発したいなと思いました。
そこで clasp を使用していこうかなと思います。
導入手順
clasp インストール
ドキュメントに従い、以下のコマンドを実行します。
$ npm install -g @google/clasp
$ clasp -v
2.3.0次にGoogle Apps Script APIの設定をオンにします。

これでインストールと設定は完了しました。
ログイン
$ clasp login
Logging in globally...
🔑 Authorize clasp by visiting this url:
https://accounts.google.com/o/oauth2/v2/auth?access_type=offline...
コマンドを実行すると認証画面に遷移するので、許可をクリックします。
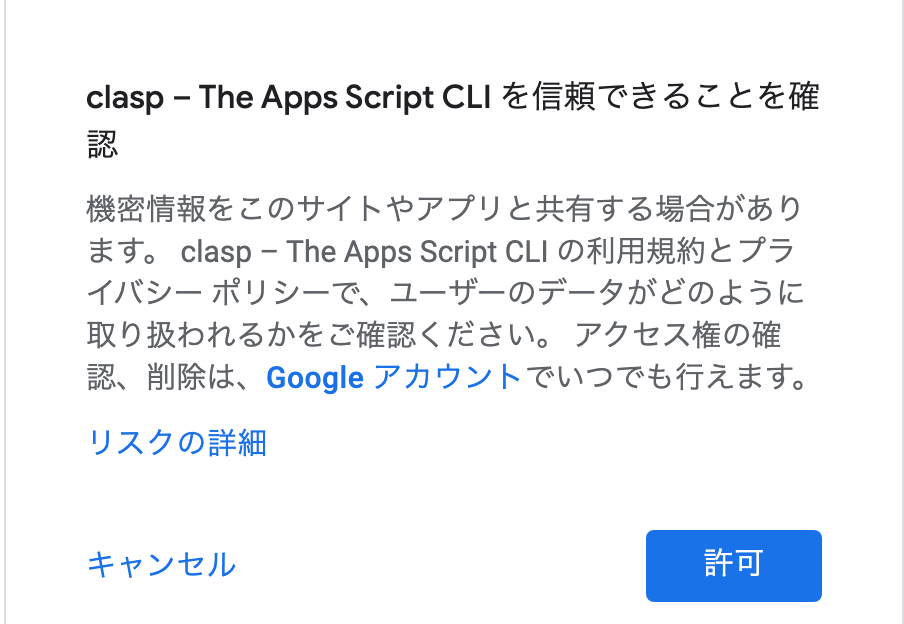
許可すると以下のようなメッセージが表示されます。
Authorization successful.

Default credentials saved to: ~/.clasprc.json (/Users/XXXX/.clasprc.json).
GAS作成
- 新規でプロジェクトを作成する場合
- 既存のプロジェクトをクローンしてくる場合
新規でプロジェクトを作成する場合
$ clasp create --title "Sample"
? Create which script?
❯ standalone
  docs
  sheets
  slides
  forms
  webapp
  api

? Create which script? standalone
Created new standalone script: https://script.google.com/d/1qaGmL6CCresCw1D-.../edit
Warning: files in subfolder are not accounted for unless you set a '.claspignore' file.
Cloned 1 file.
└─ appsscript.json
スクリプトのタイプを選択することができます。スプレッドシート から作成したい場合は「sheets」、Googleフォームから作成したい場合は「forms」で作成を行います。
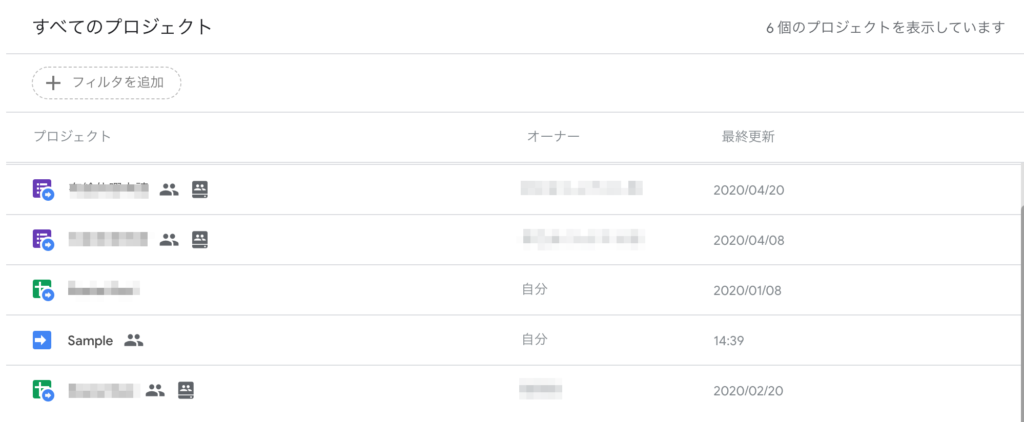
作成されているのが、わかります。
既存のプロジェクトをクローンしてくる場合
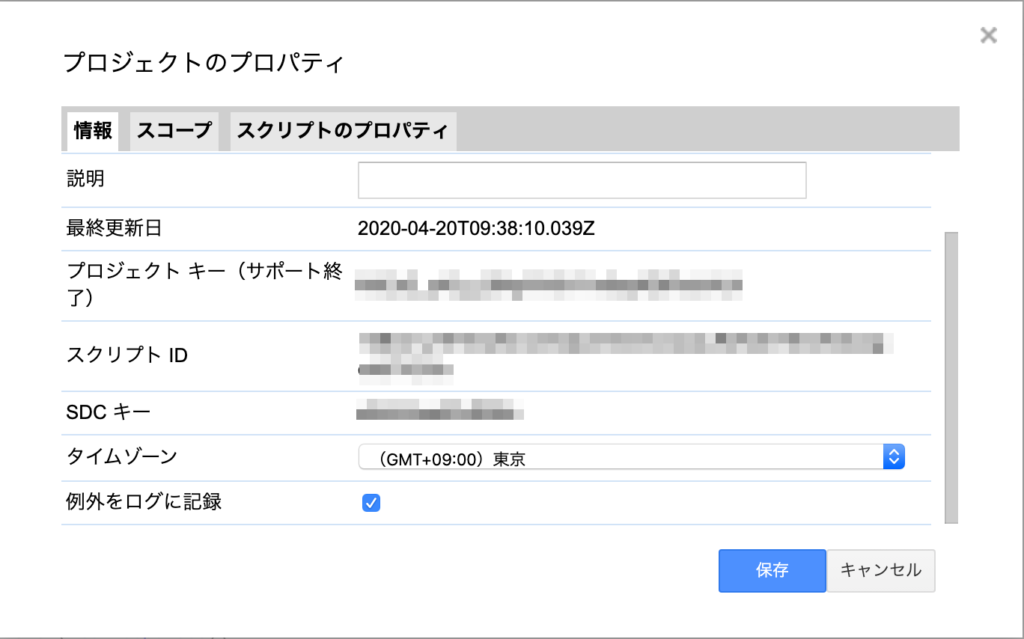
まず既存プロジェクトの「scriptId」 または 「scriptURL」を調べます。
scriptIdの場合は、エディタ画面で「ファイル」→「プロジェクトのプロパティ」を開き、スクリプトIDをコピーします。scriptURLの場合は、エディタのURLをコピーしてください。
コピーが完了したら、以下のコマンドを実行します。
$ clasp clone "scriptId or scriptURL"
Warning: files in subfolder are not accounted for unless you set a '.claspignore' file.
Cloned 2 files.
└─ appsscript.json
└─ Code.js
Not ignored files:
└─ Code.js
└─ appsscript.json

Ignored files:
これでプロジェクトの作成及びクローンは完了です。
GASを実行する
$ clasp run                                                                                                                             ✘ 1
Running in dev mode.
? Select a functionName myFunction
Could not read API credentials. Are you logged in locally?ローカルからコマンドを実行すると、エラーが出て実行できない。事前準備が必要みたい・・・
GCPでプロジェクトを作成して、OAuth クライアントIDを作成する
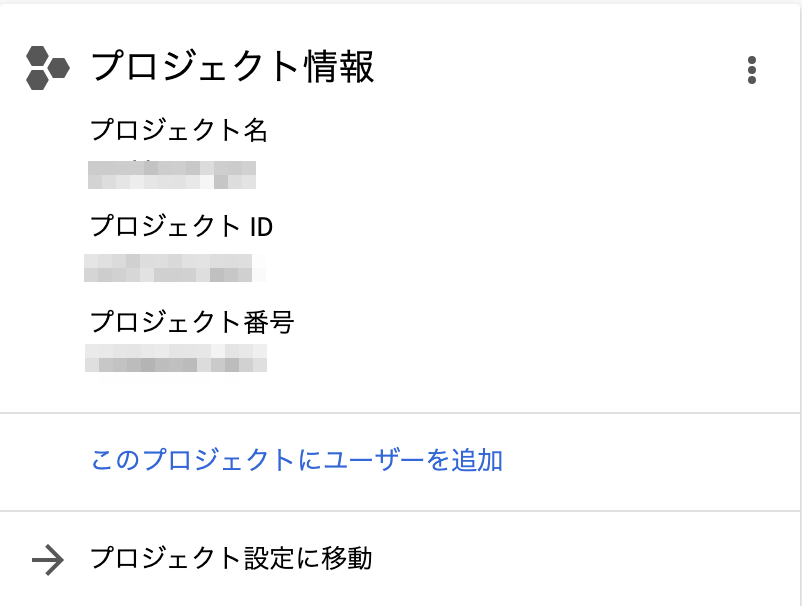
まずGCP でプロジェクトを作成します。
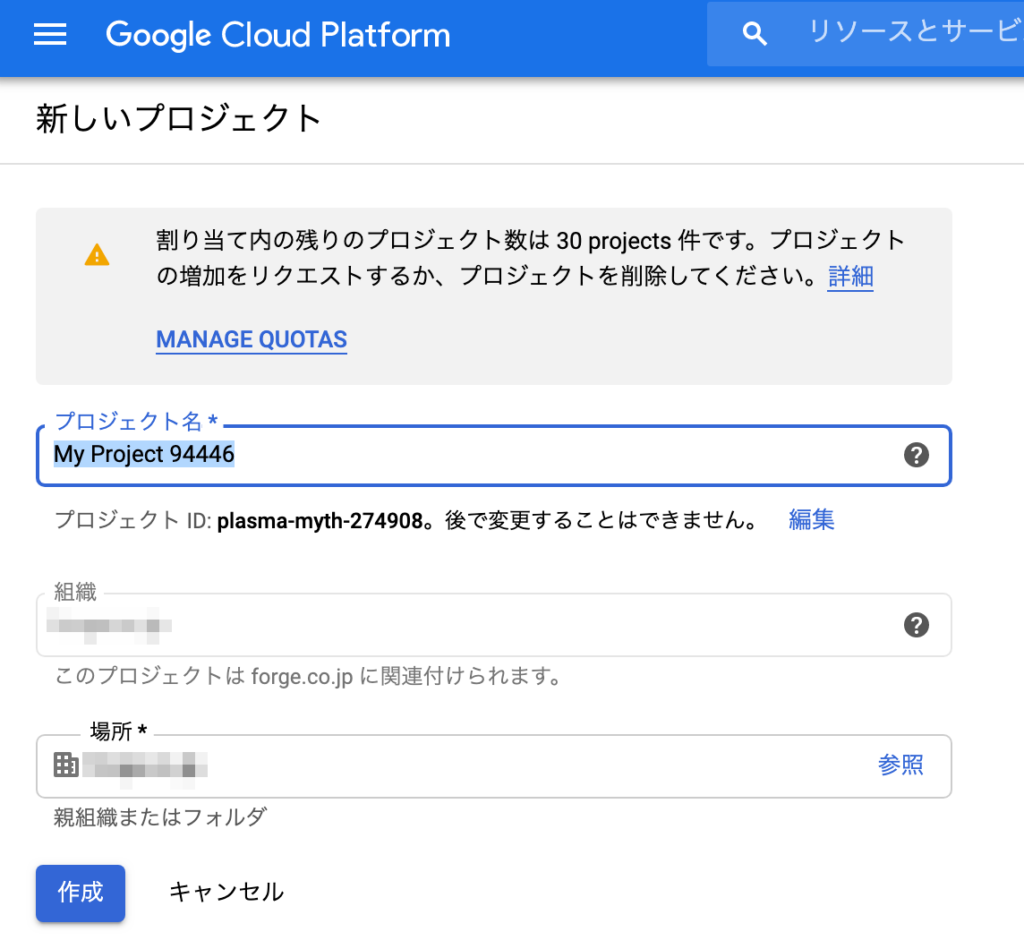
作成したら、以下の一覧の「Project ID」と「Project Number」をコピーしておきます。
以下のコマンドを実行して、ローカルの「Project ID」を設定する
$ clasp setting projectId XXXXX
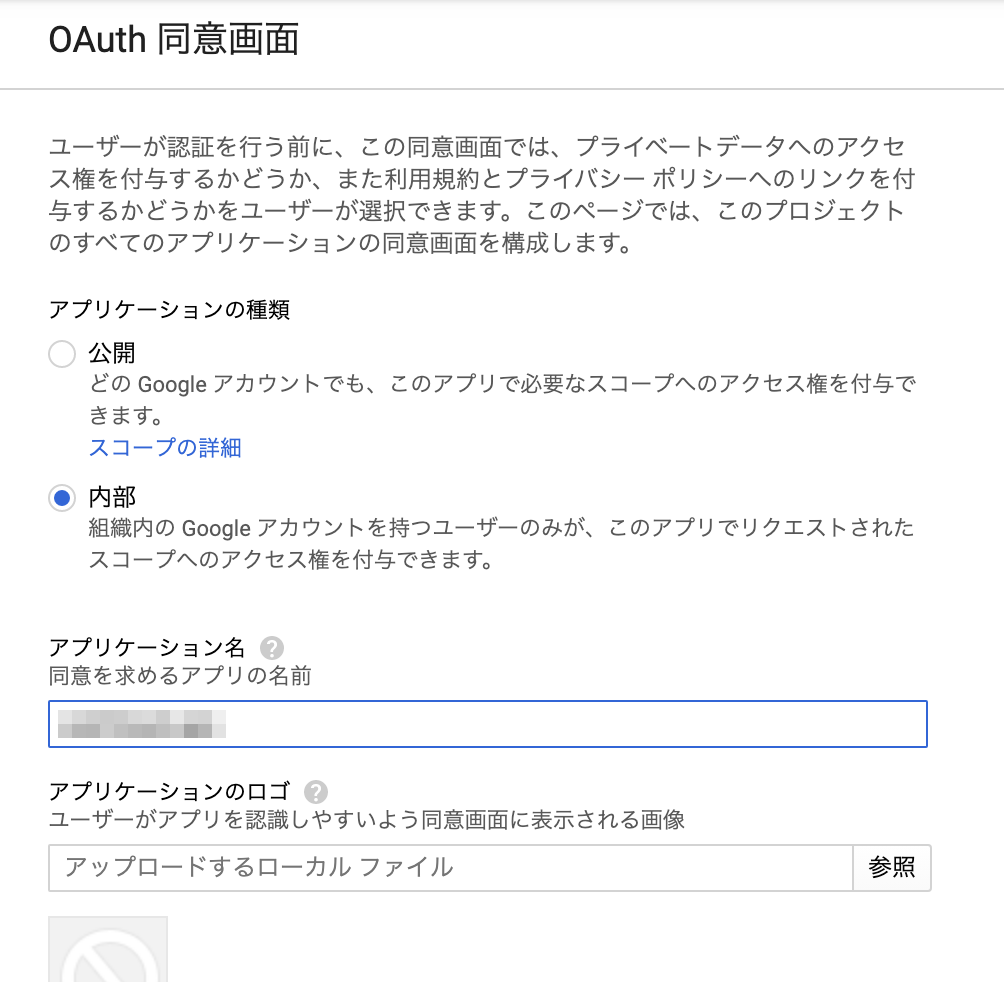
Updated "projectId": "" → "XXXXX"ブラウザで「https://console.developers.google.com/apis/credentials/consent?project=[PROJECT_ID]」を[PROJECT_ID]をコピーした「Project ID」にして開きます。
OAuth 同意画面が開いたら、アプリケーション名にclaspで作成した際のプロジェクト名を入れ、保存をクリックします。
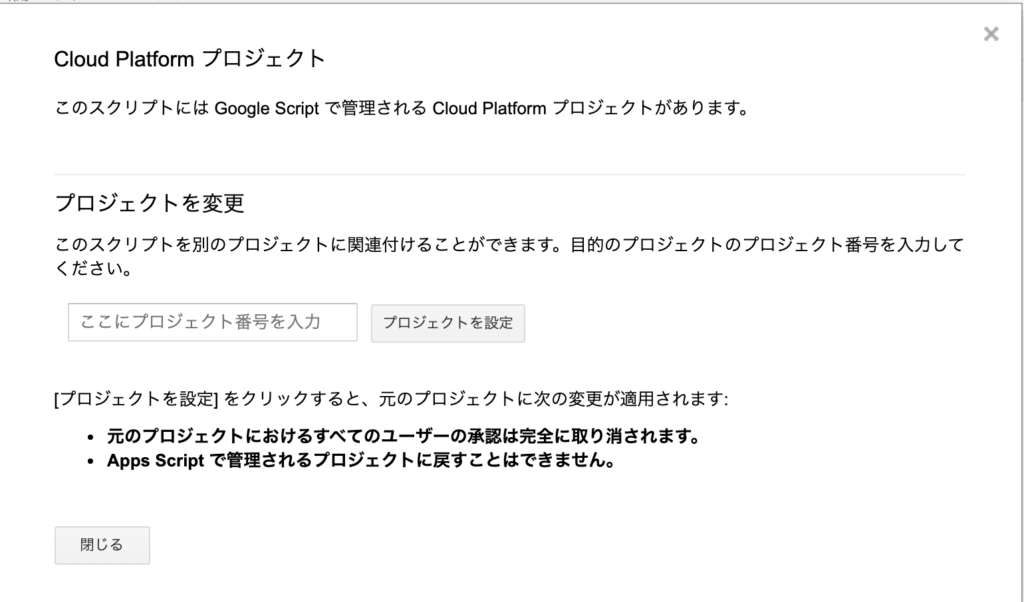
以下のコマンドを実行して、GASのエディタを開きます。
$ clasp open「リソース」→「Cloud Platform プロジェクト」を開き、コピーした「Project Number」を設定します。
以下のコマンドを実行すると、OAuth クライアントIDの作成画面が開きます。
$ clasp open --creds
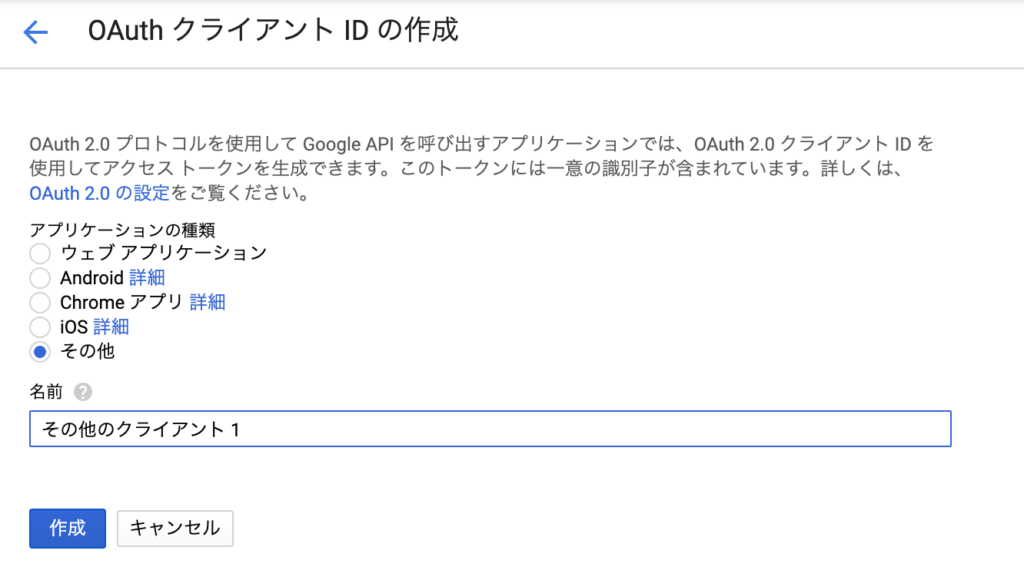
Opening credentials page: https://console.developers.google.com/apis/credentials?project=XXXX開いたら「認証情報を作成」→「OAuth クライアント ID」をクリックします。開いたら、アプリケーションの種類に「その他」を選択して「作成」をクリックします。
作成した「OAuth クライアント ID」をダウンロードし、任意のフォルダに移動します。※ドキュメントには「creds.json」と記載されているので、今回は「creds.json」とします。
$ mv ~/Downloads/client_secret_XXXXXXXX.apps.googleusercontent.com.json creds.json任意のフォルダにjsonファイルを置き、以下のコマンドを実行します。すると認証画面が表示されるので、「許可」をクリックします。
$ clasp login --creds creds.json
Logging in locally...

Authorizing with the following scopes:
https://www.googleapis.com/auth/script.webapp.deploy

  NOTE: The full list of scopes your project may need can be found at script.google.com under:
  File > Project Properties > Scopes

Using credentials located here:
https://console.developers.google.com/apis/credentials?project=XXXXX

🔑 Authorize clasp by visiting this url:
https://accounts.google.com/o/oauth2/v2/auth?access_type=offline&scope=https%3A%2F%2Fwww.googleapis.com%2Fauth%2Fscript.webapp.deploy&response_type=code&client_id=XXXXX.apps.googleusercontent.com&redirect_uri=http%3A%2F%2Flocalhost%3A53263

Authorization successful.

Local credentials saved to: ./.clasprc.json.
*Be sure to never commit this file!* It's basically a password.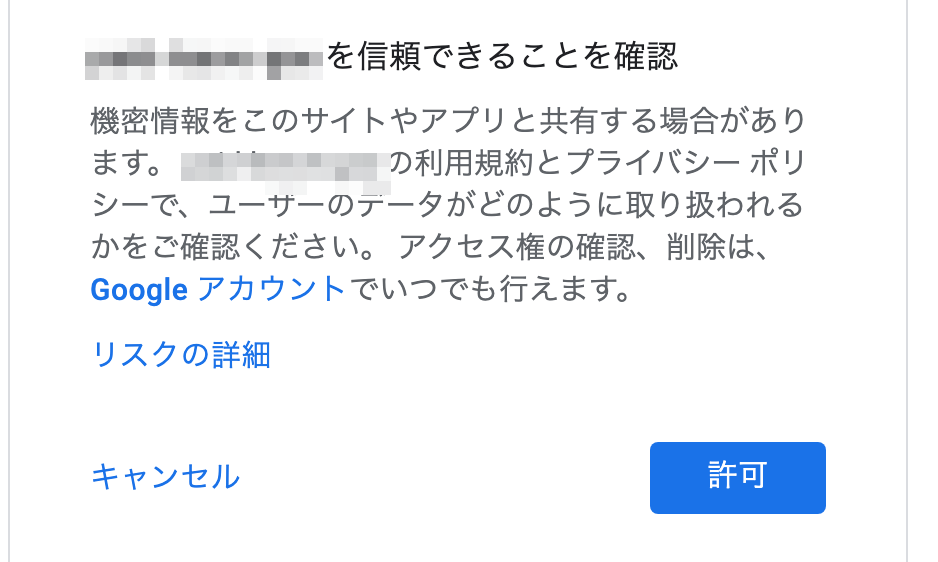
ローカルの「appscript.json」に以下のプロパティを追加し、pushします。
"executionApi": {
  "access": "ANYONE"
}
$ clasp push
? Manifest file has been updated. Do you want to push and overwrite? Yes
└─ Codes.js
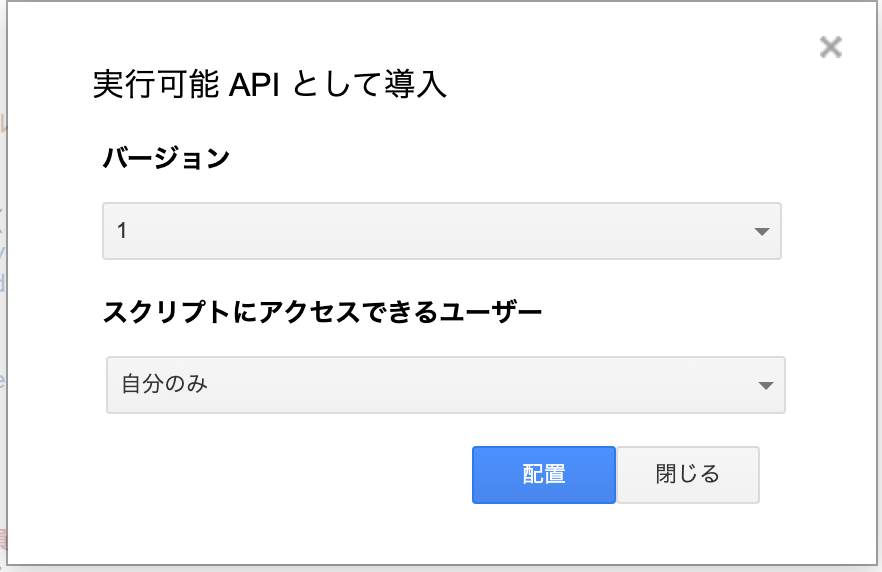
└─ appsscript.json最後にGASエディタで「公開」→「実行可能APIとして導入」をクリックします。画面が表示されたら、「配置」をクリックします。
これで設定は終わりです。ローカルから実行してみましょう。
function sample(){
  console.log("sample");
  return "sample";
}
$ clasp run sample
Running in dev mode.
sample以下のコマンドでログを確認できます。
$ clasp logs
DEBUG      2020-04-21T11:23:15.611Z N/A {"serviceContext":{"service":"AKfycbyUtd3vEFqT8l0Js1Hh8Nil8f-KxRCEi3ydKFqi"},"message":"sample"}
【追記】clasp run を実行して、permission error が出た場合
以下のように関数を実行した際にpermission error が出た場合の解決方法を書いていきたいと思います。
$ clasp run Test
Running in dev mode.
Exception: ScriptError Exception: You do not have permission to call SpreadsheetApp.openById. Required permissions: https://www.googleapis.com/auth/spreadsheets [
  { function: 'XXXXX', lineNumber: 146 },
  { function: 'XXXXX', lineNumber: 278 },
  { function: 'XXXXX', lineNumber: 285 }
]
「appscript.json」に必要なスコープを追加します。今回はspreadsheetsを追加します。
"oauthScopes": ["https://www.googleapis.com/auth/spreadsheets"]その後pushし、再ログインします。(pushだけでは同じエラーが出てしまったので、再ログインしなおしたら無事通るようになりました。)
$ clasp push
$ clasp login --creds creds.json
Logging in locally...

Authorizing with the following scopes:
https://www.googleapis.com/auth/spreadsheets
https://www.googleapis.com/auth/script.webapp.deploy

  NOTE: The full list of scopes your project may need can be found at script.google.com under:
  File > Project Properties > Scopes

Using credentials located here:
https://console.developers.google.com/apis/credentials?project=XXXXX

🔑 Authorize clasp by visiting this url:
https://accounts.google.com/o/oauth2/v2/auth?access_type=offline&scope=https%3A%2F%2Fmail.google.com%2F%20https%3A%2F%2Fwww.googleapis.com%2Fauth%2Fcalendar%20https%3A%2F%2Fwww.googleapis.com%2Fauth%2Fspreadsheets%20https%3A%2F%2Fwww.googleapis.com%2Fauth%2Fscript.webapp.deploy&response_type=code&client_id=XXXXXXX.apps.googleusercontent.com&redirect_uri=http%3A%2F%2Flocalhost%3A56788

Authorization successful.

Local credentials saved to: ./.clasprc.json.
*Be sure to never commit this file!* It's basically a password.
楽に構築できるかなと思ったんですが、意外と面倒な作業が多かったです。これで使い慣れたエディタで開発できますし、コマンドラインから操作できるようになりました。